Posted on

The relevance of quilting in 2025

The art of quilting remains highly relevant in 2025, seamlessly blending timeless traditions with modern advancements. It continues to serve as a vital medium for preserving cultural heritage, allowing quilters to honor historical narratives, document personal stories, and celebrate diverse traditions. Through quilting, these stories are kept alive and passed on to future generations.

Quilting has also evolved into a dynamic art form, with modern quilters pushing boundaries by experimenting with bold patterns, abstract designs, and unconventional materials. This innovation ensures its place in the contemporary art scene. At the same time, quilting aligns with the growing global focus on sustainability. By repurposing fabric scraps, recycling old textiles, and upcycling materials, quilters actively contribute to more eco-conscious lifestyles.

The social aspect of quilting remains strong, fostering connection and community. Quilt guilds, exhibitions, and online platforms bring people together, creating opportunities for collaboration, skill-sharing, and intergenerational bonding. For many, quilting also serves as a form of therapy, with its repetitive, hands-on process offering mental health benefits like mindfulness, stress relief, and creative expression.

Advances in technology have made quilting more accessible and innovative. Digital design tools, long-arm quilting machines, and online resources enable both beginners and experienced quilters to hone their craft and create unique works of art. Quilts continue to strike a balance between functionality and beauty, serving as cherished household items, decorative pieces, and heirlooms that hold personal and emotional value.

In addition to its cultural and artistic significance, quilting presents economic opportunities. Handmade quilts are highly valued, and many artisans turn their passion into thriving businesses by selling their creations or teaching their techniques. Quilting in 2025 remains a testament to the enduring power of craftsmanship, blending tradition with innovation to stay a vital part of art, culture, and community.

Posted on

Choosing a colour palette for your quilt

Choosing colours for any quilting project is a creative and enjoyable process that greatly impacts the overall aesthetic of a quilt. The selection of colours involves considering personal preferences, the intended design, and the mood or theme of the project. Here are some tips and strategies to help guide colour choices for hand piecing:

Understand Colour Theory

Familiarize yourself with the basics of the colour wheel, including primary, secondary, and tertiary colours, as well as complementary, analogous, and triadic colour schemes. You can also, with great succes use a monochrome scheme. This can be as easy as to read your colour wheel.

A colour wheel with primary and secondary colours


Use the principles of contrast and harmony to balance bold and subtle tones in your design.

Start with a Focal Fabric

  • Select a fabric with a pattern or colour scheme that inspires you and build your colour palette around it.
  • Pull colours from the focal fabric to coordinate your other fabric choices, ensuring cohesion across the quilt.

Consider the Mood or Theme

  • Choose colours that reflect the mood you want to evoke. For instance, soft pastels create a calm and soothing feel, while bright, vibrant colours convey energy and playfulness.
  • Seasonal or thematic quilts (e.g., autumn leaves, seaside scenes) often draw from specific colour palettes associated with the theme.

Cosider these two patterns for a scatter cushion.

Test Value and Contrast

  • Incorporate a mix of light, medium, and dark shades to create depth and visual interest.
  • Use value contrast to define patterns, ensuring individual pieces stand out rather than blending.
  • Viewing fabrics in black and white (by taking a photo, change the effect to grey scale or using a colour-reducing app) can help evaluate value differences.

Use a Design Wall or Mock-up

  • Arrange fabric swatches on a design wall or piece them together loosely to see how the colours interact.
  • Adjust the placement or swap fabrics until you’re satisfied with the overall balance.

Limit or Expand Your Palette

  • For simplicity, start off with a limited palette of 2-3 colours for a cohesive look.
  • If you are a little braver, you can embrace a scrappy style by including many different colours, united by a common feature like tone, value, or pattern. Group the fabric in tone value – light medium or dark, rather than colour.
  • Another trusted method is to choose a focus fabric and pick up the colour palette from the prints on the fabric with the rhyme: one darker, one lighter, one duller one brighter. This gives you a pallet of five colours. Your personal taste will depend on the fabric you want to emphasise. (Beyer, 2019) This method ensures a balanced palette with effective variety in tone values.

Experiment with Fabric Patterns

  • Combine solids and prints for variety. Solids can anchor the design, while prints add texture and interest.
  • Consider the scale of the fabric patterns to ensure they complement rather than overwhelm your design.

Use Pre-made Colour Tools

  • Colour cards, quilting colour wheels, and online palette generators can inspire your choices and provide combinations that work well together.
  • Explore fabric collections from designers, as they often include pre-coordinated fabrics that simplify the selection process.

Be Inspired by Nature or Art

  • Nature provides endless colour combinations that work beautifully together—think of the greens and blues of a forest or the warm hues of a sunset.
  • Artwork, photographs, or even home décor can spark ideas for unique colour palettes.

Trust Your Intuition

  • Ultimately, quilting is a personal expression of creativity. Choose colours that resonate with you, as they will make the process more enjoyable and the final piece more meaningful.

By thoughtfully selecting colours, quilters can bring their designs to life, creating visually stunning and emotionally resonant quilts. Experimentation and practice will help develop a personal style and a keen sense for combining colours effectively.

Posted on

Christmas 2024

As the holiday season draws near, I want to take a moment to wish each of you a very Merry Christmas and a joyful New Year. This time of year is filled with magic, warmth, and togetherness—qualities that remind us of the importance of kindness, gratitude, and love.

To my students, thank you for your hard work, curiosity, and enthusiasm throughout the year. You’ve brought so much energy and creativity to our classroom, and I couldn’t be prouder of all that you’ve accomplished.

May your holiday season be filled with laughter, rest, and the company of those you cherish. I hope you find time to enjoy the little things that make this time so special—sparkling lights, warm treats, and the joy of giving and receiving.

Take care of yourselves, have fun, and come back ready for more adventures in the new year!

To say thank you, I have reworked the Christmas quilt of 2011 a little and include the pattern to download for free. The first layout is for a wall quilt or throw and finishes at 51″ x 51″

Christmas 2024

If you want to use the pattern to make a tree skirt, you might like to use this alternative layout.

You may choose to buy fabric for this project, or use scraps in pieces of green or red, Enjoy!

DOWNLOAD FOR FREE

Be blessed and stay safe this holiday,
Danél
2024

Posted on

Beginners’ Table Runner 2024

Beginner Quilt classes starting on 6 April

Hierdie tafelloper is die kombinasie van ‘n hele paar kwilt tegnieke, om ‘n grondslag te lê vir die mees gebruikte laslapmetodes. Appliekwerk, papier fondasie laslap en tradisionele laslap word aangeraak.  Dit is ook belangrik om ‘n bietjie van die wiskunde agter die laslap te verduidelik. Dit maak dit later makliker, om enige patroon self uit te werk. Goeie gewoontes word vasgelê van die eerste oomblik.  Die projek kan voltooi word in 7 klasse.

This table runner is a combination of the three most used patchwork techniques – appliqué, piecing and paper foundation piecing. It is also important to learn how to read a quilt pattern and how to accurately calculate the cutting sizes of the blocks. This project can be completed in 7 classes.

Klasse begin 6 April 2024 – Classes start 6 April 2024

Please Whatsapp Danél Muller at 0824167690

Posted on

Quilt in Clarens 2023

8th Clarens Quilt Festival 28 June 2023 – 1 July 2023

I’ll be teaching at the Clarens Quilt Festival this year. I am teaching three brand new classes.

Stems and Vines Thursday 29 June 2023

This class focusses on the cutting of binding on the straight grain and on the bias, the preparation of the strips and how to appliqué by hand and machine. As a bonus, I’ll show you how to weave the strips to make a shape, in this case the heart in the center of the project.

Curves on a straight line – Friday 30 June 2023

Using paper foundation piecing, this pattern produces bold statement in swirls and diamonds to brighten up any space.

Misty Landscapes – Saturday 1 July 2023

This class is about the application of net applique to produce a soft misty edge to the picture.

More information about the Festival and how to reserve a space at http://www.quiltinclarens.co.za/

See you there!!

Posted on

Curves on a straight line

The Snails Trail block is based on the Square-on-square block with 5 layers, combined with a Four-Patch. The Four-Patch is inserted as the center block. By changing the colours the Snails-Trail is created.

A block that is sometimes confused with the Snails Trail is Monkey Wrench. Can you see the difference? Monkey Wrench is based on a four layered Square-on-Square.  The Four Patch in the center is now turned on-point.

And then there is the Pig Tail Block. It is based on a six layered Square-on-square block. It doesn’t have a Four Patch in the centre.

When you combine four Snails Trail blocks, the pattern is called Virginia Reel.

Snails Trail can also be combined with other blocks to create interesting secondary patterns. Combining Snails Trail, Monkey Wrench or Pigs-tail with Storm-at-Sea, the illusion of curves is further advanced.

It is almost impossible to believe these quilt patterns are made without curved piecing.

Monkey Wrench was first published in 1922 as part of the Lady’s Art Quilt pattern. Snails Trail was first published in 1928 in the same collection. The first references were made to the Virginia Reel in 1930.

Other patterns that use Snails Trail and or Monkey Wrench are:

  • Romantic Trail by Tammy Vanderschmitt
  • Let’s Dance – published by Beaquilter
  • Sea Scapes by Shirley Sickenger
  • And the scrappy friendly version Tornado, published by QuiltingDaily.com

My last design for the day is a design that might pass for a modern quilt using Pig-Tails and Storm-at-Sea.  Using 12” blocks with 4 ½” sashing these finishes at 95” x 95” for a big queen. 
I call it Dragon Star.

Posted on

Piece like a pro

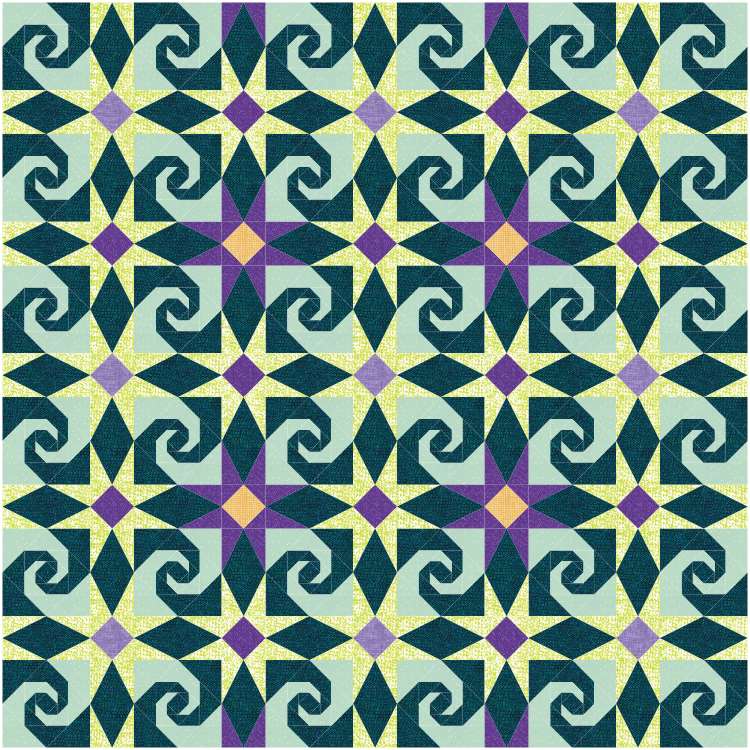
All quilters started somewhere and I can remember looking at quilts in awe and asking myself how on earth a person can consistently align corner to corner and point after point to form the perfect pattern. In my quest to conquer this perfection, I have learned the following lessons:

Slow down

The first and probably most important lesson I had to learn was to slow down. I have finally realized that there is no way to keep control of your sewing at 100km / h. Slow down and enjoy the process. I can add to this point, to be careful not to over-commit when making a quilt. Working against an impossible deadline doesn’t help accurate piecing. 

Pre-wash or not?

There are many pros and con’s to the pre-washing of fabric. Personally, I pre-wash fabrics before using them. The best reasons are to make sure the colors don’t run and to get rid of the starch used in the weaving process. I tumble dry it to damp and then spread it out on a flat surface to dry completely. I don’t iron it at this stage, as the fabric will probably be ironed a couple of times before I finish the quilt. Drying it in this way relaxes the fibers and it is easier to find the straight grain to cut on.  Every quilter can relate to a story that includes colors that “ran”. If you are in doubt, wash your fabrics with color catchers to absorb the excess dye. 

Cut accurately

Cutting accurately is the first step of accurate piecing. Make sure, very sure of the measurements that you are to cut. Measure twice. Cut in a space with adequate lighting. Cut with a sharp rotary blade on a cutting mat. Use a ruler that you can easily see the edge of the fabric through. Hold the ruler securely in place with a flat hand on the surface.  Cut from near to far. Close the rotary blade when you are finished. 

Find your quarter

Quarter-inch seams are synonymous with quilting, but have you really found that quarter-inch yet?  The easiest way to test whether you have found the quarter is to cut 3 two and a half-inch strips. Sew them together and press lightly. Does the center strip measure a perfect two inches? Does it vary? 

At this stage, it might be interesting to look at the way you align your fabric on your sewing machine. You can use a quarter-inch pressure foot and line the fabric up on the side of the foot. I personally use a general pressure foot and move my needle position to the right. In this way, the feed dogs under the fabric line up with the pressure foot with full contact and gives the fabric more stability. It definitely produces more even seams. 

Another way to line up your fabric is by attaching a piece of insulation tape to mark the help your alignment. Some machines also have magnetic alignment tools that keep your fabric aligned. It is worthwhile to spend some time to find the sweet spot where you hit the perfect quarter every time. 

Scant Quarters

You may find patterns and instructions that talk of a scant quarter. A scant quarter is just a little (1 or 2 threads) less than a quarter inch. You will find that sewing on the bias for half-square triangles and quarter-square triangles, a scant quarter will work better than a quarter-inch seam. It also gives a little extra fabric to resize the unit. In a complex pattern, sewing with a scant quarter seam can help for the same reason. 

Finding the spot X

When you sew sharp points on a star or any other triangle, it is simple to find yourself in a position where there is not enough seam allowance on the outer side of the point, leading you to chop off the sharp point. In a pattern where you need to make a Y seam, there are many ways to create bubbles, knots, and chops if you aren’t careful. 

All these problems can be prevented if you know where the X Spot is Every corner that you sew, has a point where the two quarter-inch lines cross. This is not a quarter inch from the tip. If you mark this spot on each corner and sew from corner to corner, you will end up with a quarter-inch seam allowance. It is therefore worth the time and effort to measure and mark this spot when sewing tricky corners. 

Press

Pressing is another part of piecing that is often overlooked. Press on the stitched line to set the seam, before opening the patches. Press the seam to the dark side. Quilters are normally split 50/50 on whether to use steam or not. Smaller seams can be finger-pressed or pressed with a small wooden tool or Hera marker. When you have pressed, the fabric should lie down and not bounce back. Take care not to distort the fabric in the pressing process. 

Size after every step

The last step to accurate piecing is to cut the patches to the correct size before the next step. Make sure that you know what the size must be, including the seam allowances. This lays the groundwork for the next layer to the block and quilt. A patch unit will not grow in size between processes, however hard you try. It is easier to accept the inevitable earlier in the process. 

Finally, it is important to remember to embrace the process, enjoy the time that you spend with your fabrics and that every quilter will piece to the level of their own satisfaction. It is, after all, the journey that matters. Be kind to yourself.  Happy quilting! 

Posted on

Where to learn Basic Quilting Skills?

15 years ago, I didn’t think it possible but in 2006, I started my quilting journey. And what a journey! I jumped right into it! I didn’t know where to learn basic quilting skills.

In retrospect, I know that my quilting journey might have been a lot easier if I did a course in basic patchwork and quilt making to use as foundation for my artwork at that stage. This brings me a full circle since qualifying as an accredited quilt teacher of the South African Quilters Guild.

This quilt finishes in a quaint pictorial sampler called : “Through the Eyes of Cy”. When I developed the pattern, I used my 4 year old grandson, Cylus, to imagine how he looks at the world around him. Since he loves to draw in bright colors, these are the colors I design with.

True to my background, I designed my sampler in pictorial style, row by row with each row specializing in another technique.

Is this quilting course also for advanced quilters, you may ask. I bet that you will be challenged at some or other stage during the construction. You might also find some of the techniques you avoided previously, surprisingly stimulating. I mostly find people attracted to the mesmerizing addiction of hand piecing and needle turn applique.

“Through the eyes of Cy” is a happy, content rich quilt that will look lovely hanging in your home or cuddled by a little boy. There are also patterns available in larger sizes to cover a single bed (for a lucky boy). You also learn the basic quilting skills as you go!

Techniques included in this course include:

– Machine piecing
– Hand Piecing
– Machine Applique
– Hand Applique
– Paper Foundation Piecing
– English Paper Piecing
– Seminole braids
– Y insert seams
– Easy applications for Flying Geese
– Star Blocks
– Borders Bindings and Sleeves
– Finishing off with a pretty label
and many more…

Through the eyes of Cy - Made by Judy Barnard
Through the eyes of Cy – Made by Judy Barnard

Contact me for the starting date of the next course. I teach in the East of Pretoria.

Other courses by Danél Muller

Posted on

A pictorial quilt-techniques quilt-along sampler.

Join me in making the “Through the eyes of Cy” pictorial quilt-techniques quilt-along sampler.

Fishes in the deep blue sea - the first block in the quilt along by Danel Muller - Lenad Quilting
Fishes in the deep blue sea – The first block in the
pictorial quilt-techniques quilt-along sampler by Danel Muller – Lenad Quilting

Every teacher needs a sampler quilt. Not strictly being a traditional quilter, I therefore vied away from the traditional sampler quilt and came up with this interesting pictorial version. This quilt finishes at 30″ x 42″ (67 cm x 102 cm) without borders.

The first block in “Through the eyes of Cy“  is Fishes in the deep blue sea. As you can see,  I used the naive therefore bright drawings depicted in the artworks of my 4 year old grandson, Cylus, as design inspiration for this pattern.

This sampler is taught over 12 weeks.

Teacher: Danel-Marié Muller
Venue: 40 on Ilkey B&B, Lynnwood Glen Pretoria
Tel: 082-416-7690
Cost: R150 per lesson
Start date: Contact me for the next date


Every second and fourth Wednesday of the month
Time: 9:00 – 13:00
Every first and third Saturday of the month
Time: 12:00 – 16:00

Beginners welcome
Tea and coffee is included in the class fee

In conclusion, you will need to bring the following to class:

  • A working sewing machine.
  • A rotary cutter, as well as a 12″ square ruler and cutting board
  • Scissors, pins and number 10 sewing needles
  • However, don’t bring fabric, thread as it will be discussed in the class to prevent excess and wrong purchases.

Register here or contact me if you want me to teach in your area. I am willing to travel within Gauteng (minimum 5 students).

This pictorial quilt techniques quilt-along sampler is brought to you by Lenad Quilting.

Other courses by Danél @ Lenad Quilting

Hope to see you here!

Danél