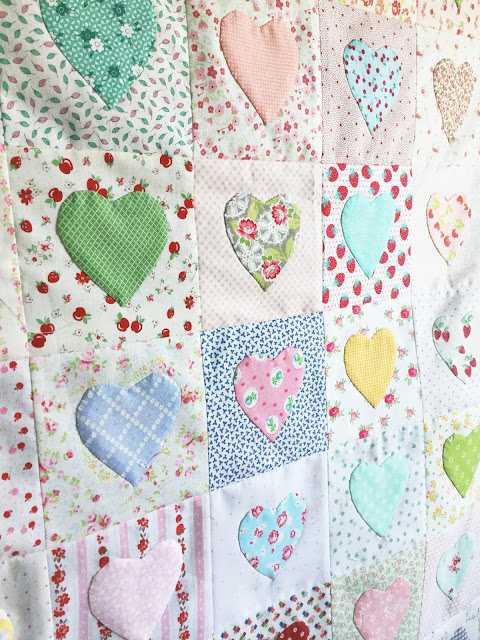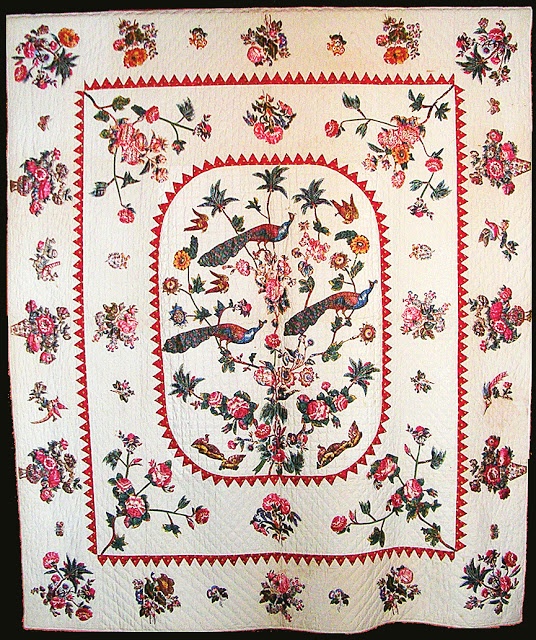
Broderie Perse is a refined appliqué technique in which printed motifs are carefully cut from one fabric and stitched onto another to create a new, often more elaborate composition. The name, meaning “Persian embroidery,” reflects the European fascination with exotic textiles in the eighteenth century, particularly the richly patterned chintzes imported from India. Though it appears painterly and spontaneous, Broderie Perse is in fact a disciplined process that combines precision cutting, thoughtful design, and meticulous handwork.
The process begins with the selection of fabric. Traditionally, quilters chose large-scale printed cottons—especially glazed chintz—featuring bold flowers, trailing vines, birds, or decorative urns. These prints were expensive, and rather than use the fabric in large uncut pieces, needleworkers maximized its beauty by isolating the most striking motifs. A contrasting background fabric, often plain or lightly patterned, is selected to allow the appliquéd motifs to stand out clearly.
Once the fabrics are chosen, careful planning of the design follows. The quilter arranges the cut motifs on the background to create a balanced and harmonious composition. Historically, wreaths, floral sprays, vases overflowing with blossoms, and central medallions were common arrangements. Although many antique pieces appear symmetrical, subtle variations in placement give the design vitality and movement. This stage is crucial: the goal is to create the illusion that the motifs were originally printed together as a single, continuous design.
The next step is fussy cutting. Using small, sharp scissors, the quilter cuts closely around each printed motif, following its contours with precision. In traditional needle-turn methods, a narrow seam allowance is left around the edge to be turned under during stitching. In contemporary adaptations, quilters may cut exactly on the printed line and use fusible web to secure the motif before stitching. Regardless of method, accuracy in cutting determines the elegance of the final result.
After cutting, the motifs are positioned and secured onto the background fabric. In traditional Broderie Perse, each shape is attached using fine slip stitches worked by hand, with the seam allowance turned under as the stitching progresses. The stitches are intentionally small and nearly invisible, preserving the illusion that the motif grows naturally from the cloth. Layering may occur at this stage; leaves might overlap blossoms, or additional buds may be inserted to fill gaps and create continuity between separate pieces.
An important artistic aspect of Broderie Perse lies in blending individual cut motifs into a cohesive whole. Quilters often adjust placement slightly, add small filler elements, or overlap edges to disguise boundaries. The objective is seamless integration—transforming isolated fragments into an organically flowing design.
Quilting completes the process and enhances the appliqué. Fine outline quilting around motifs defines their shapes, while background quilting—such as echo lines or delicate fillers—creates texture and depth. In historical examples, quilting was often restrained, framing the appliqué without competing for attention. Occasionally, additional embellishments such as embroidery were added to emphasize details or add a subtle dimension.
Historically, Broderie Perse flourished in late eighteenth- and early nineteenth-century England, France, and America. It represented both practicality and luxury: practicality in its economical use of costly printed cottons, and luxury in the elaborate compositions it enabled. Today, the technique continues to appeal to quilters who appreciate its painterly quality and its blend of historical tradition and artistic freedom.
In essence, Broderie Perse is more than appliqué; it is an act of transformation. Through deliberate cutting, thoughtful arrangement, and careful stitching, printed fabric is reimagined into a new visual narrative. The process demands patience and precision, yet rewards the maker with a composition that feels both historically rooted and uniquely personal.